To ensure fair internet access for all Hughesnet® customers, Hughesnet maintains a special Fair Access Policy that establishes an equitable balance in internet access for all Hughesnet subscribers. Similar to how cell phone providers manage their data plans, all Hughesnet plans come with an allotment of data, that may be downloaded or uploaded within each monthly billing cycle. Subscribers who exceed this amount may experience slower speeds during high-traffic periods until their next billing cycle.
Here are some tips to optimize your data usage:
1. Enable Video Optimizer for optimized streaming experience up to HD quality.
2. Turn OFF devices when not in use
3. Schedule downloads/updates during Bonus Zone
For current Terms and Conditions and additional information, go to the Subscriber Agreement here.
If you have already registered on myhughesnet.com and have forgotten your Username and/or password, you can use the following FAQ article to gain access to your account. Note: If you have not previously registered, click here for instructions on how to register.
Click on the links below to navigate to the respective section of the article:
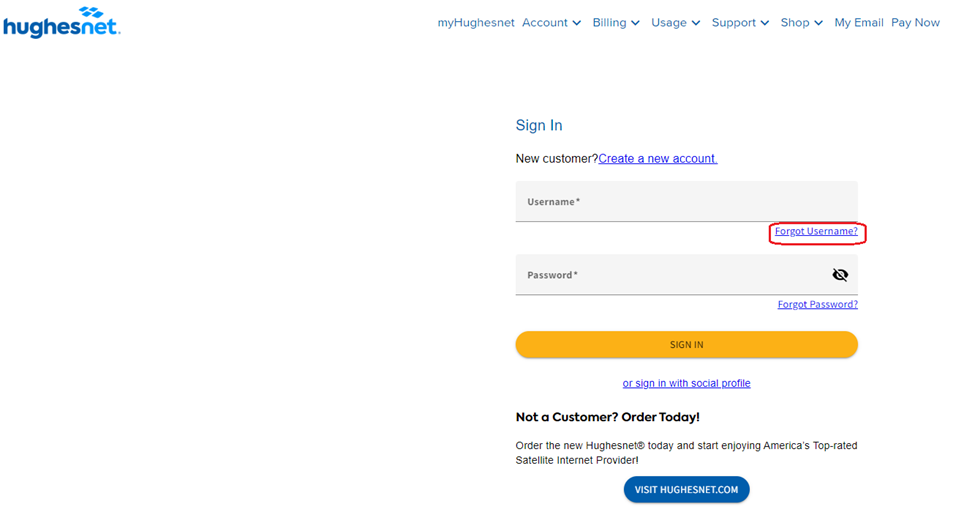
1. If you have forgotten your Username, you can click the Forgot Username link found on the ‘Sign In’ screen.
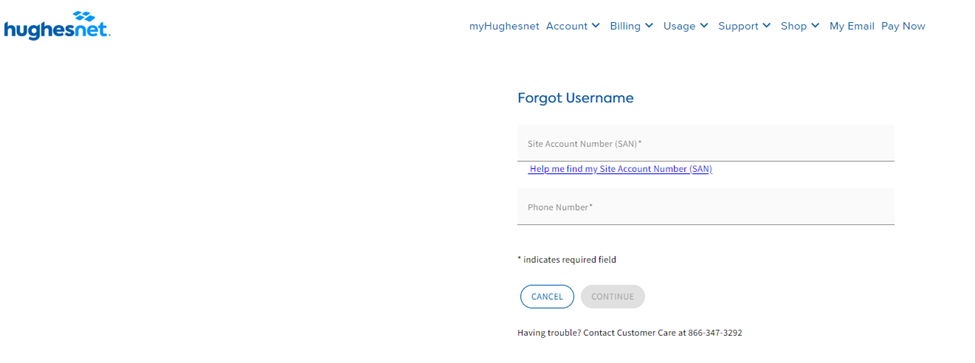
2. You will be required to enter your Site Account Number (SAN) and telephone number associated with your account before proceeding. If you do not know your SAN, you can find it on http://www.systemcontrolcenter.com (only when connected to your Hughesnet® internet), or on your monthly statement, or on your Order Confirmation email.
3. A list of Usernames associated with your account will display. Select the Username you want to login as and continue with the sign in process.
I forgot my Password
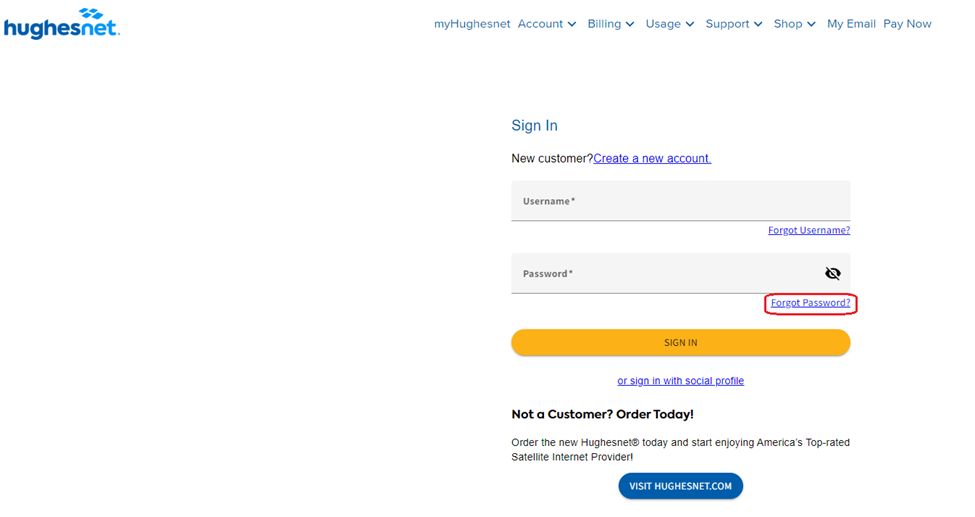
Step 1: If you have forgotten your Password, you can click the Forgot Password link found on the ‘Sign In’ screen.
Step 2: Depending on whether a ‘Recovery Mobile Number’ was provided at the time of creating the account, or when you login later, you have two options to reset your forgotten password.
Option 1: “Recovery Mobile Number” is previously setup
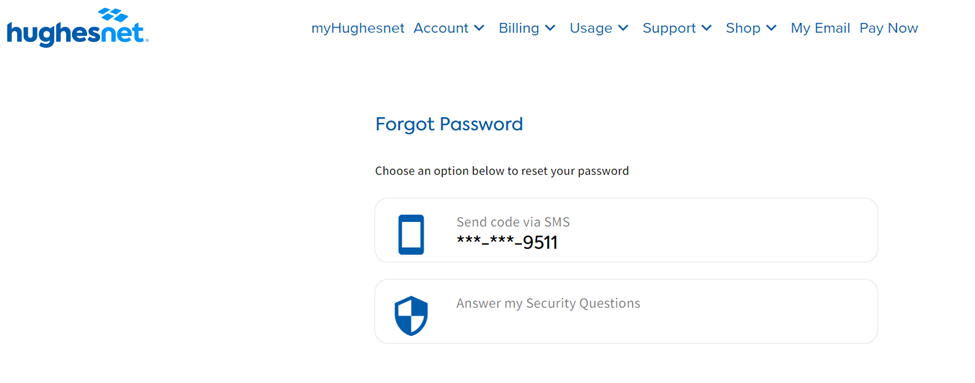
You will be presented with two options to reset your password like the image below:
If you click ‘Send code via SMS’, it will send a one-time pass code to your mobile number. You can then enter this code to set your new password.
When you click ‘Answer my Security Questions’, you will be able to see the security questions you setup previously, and submit the answers to those, before setting your new password.
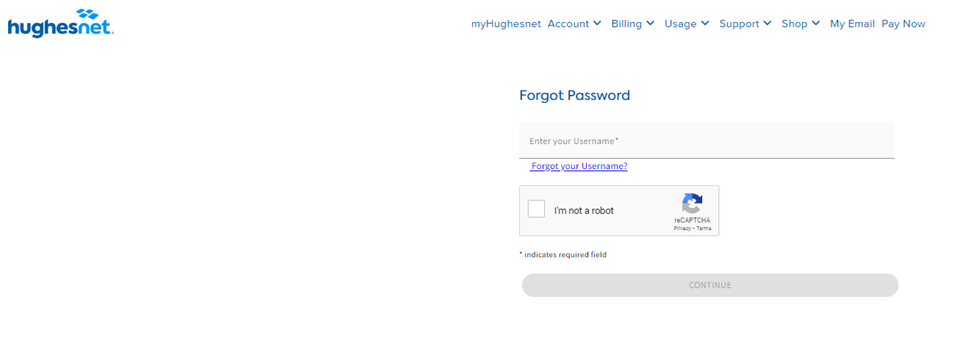
Option 2: No “Recovery Mobile Number” provided
If the ‘Recovery Mobile Number’ is not previously setup, you will be prompted to enter your Username to reset your password. Check the ‘I’m not a robot’checkbox and then click ‘Continue’ at the bottom of the page.
2. You will be asked to answer your pre-set security questions. You must correctly answer all of the questions to proceed. Answers are case-sensitive.
3. If you have not set your security questions, please contact Customer Care at 866-347-3292 for further assistance.
4. When you have successfully answered the security questions, you will be prompted to set your new password.
Other Related FAQs:
For instructions on setting up a recovery mobile number, click here.
Completing security questions ensures your online Hughesnet account is secure and allows you to easily reset your password if forgotten.
Why am I being asked to select security questions in myhughesnet.com?
The security questions and answers are an added feature for more secure access to your HughesNet account. If you forget your password, you can reset it online by answering the security questions you have chosen. Also, Single Sign On (SSO) functionality allows you to login to your account online and on the Hughesnet Mobile App.
Why am I being asked to enter my Site Account Number (SAN) and Daytime Phone Number again?
You will be asked to verify your SAN and Daytime Phone Number if this is the first time you are logging in.
I forgot the answers to my security questions, how can I reset them?
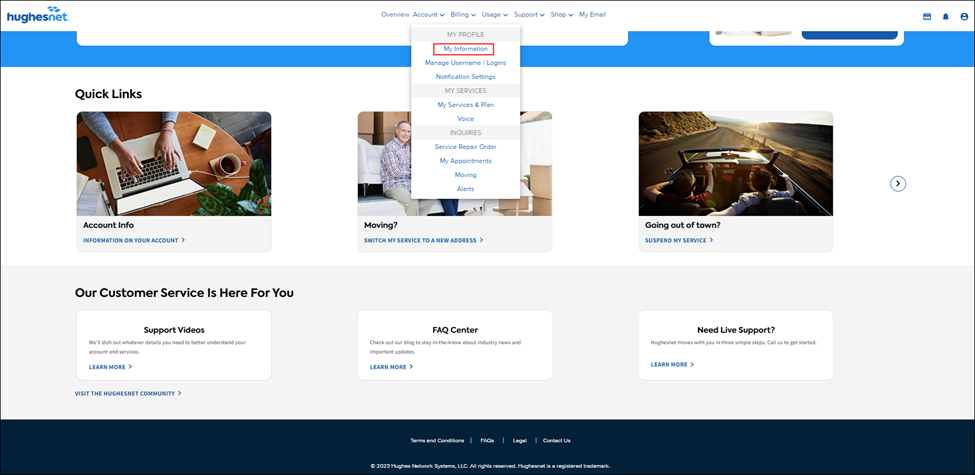
1. If you can login to myhughesnet.com, but forgot the answers to your security questions, you can reset your questions and answers by going to ‘Account’ and then ‘My Information’.
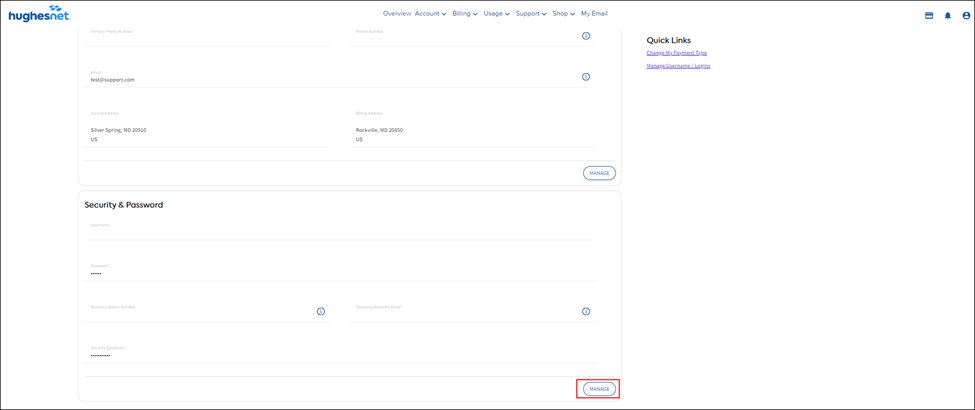
2. Under ‘Security & Password’, select ‘Manage’. The following screen prompts you to select your three security questions.
If you are unable to login to myHughesNet.com and forgot the answers to your security questions, please call Customer Support at 866-347-3292. A representative will be able assist you by resetting your password.
Home networks include everything connected to your Hughesnet® internet – from multiple computers to Wi-Fi devices such as tablets and smartphones. Learn more about Hughesnet home network capabilities.
You can connect multiple home computers and laptops to a single Hughesnet internet connection. Home networking equipment may be required and is not included with your Hughesnet system. For network setup, support, and configuration, contact your network hardware manufacturer and/or operating system software developer (Hughes is not responsible for home network configuration or management).
All computers on your network will share a single internet connection. This includes Wi-Fi devices such as tablets and smartphones as well.
Is there a limit to the number of computers I can connect?
You can wirelessly connect as many devices as you want to. However, several devices connected to your internet simultaneously may result in performance degradation. Hughesnet offers a variety of Service Plans to accommodate your internet usage needs. Click here to help find the right plan for you.
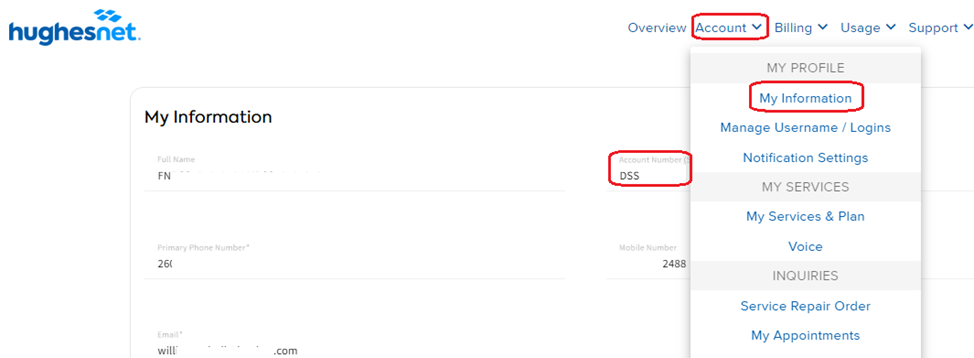
If you have previously registered on myhughesnet.com, you can sign in online to easily locate your Site Account Number.
Once logged in, click on ‘Account’ then ‘My Information’. Your SAN will be located here.
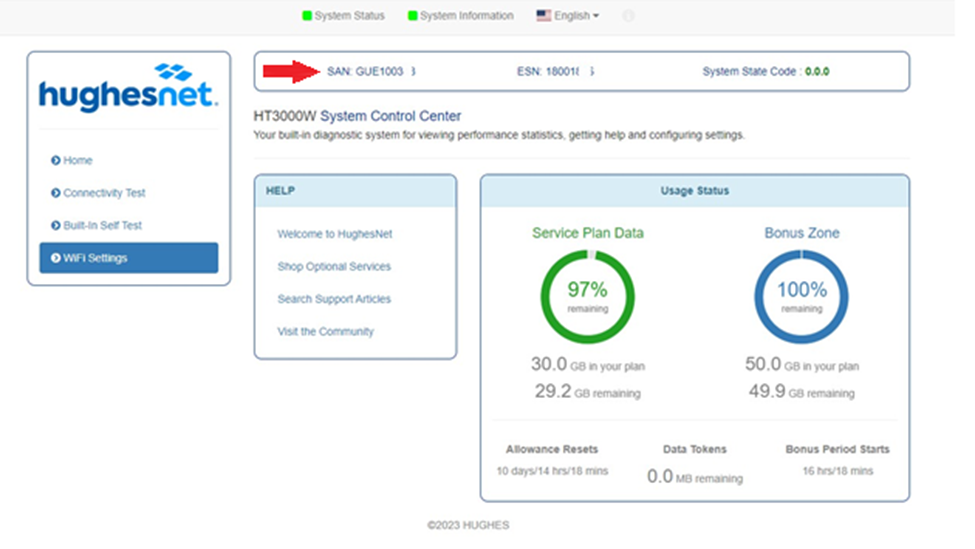
Locating your SAN from your System Control Center
Launch an internet browser and type www.systemcontrolcenter.com. You must be connected to your Hughesnet modem, but internet access is not required to visit the System Control Center.
Once in the System Control Center you will find your Site Account Number (SAN) located at the top of the page.
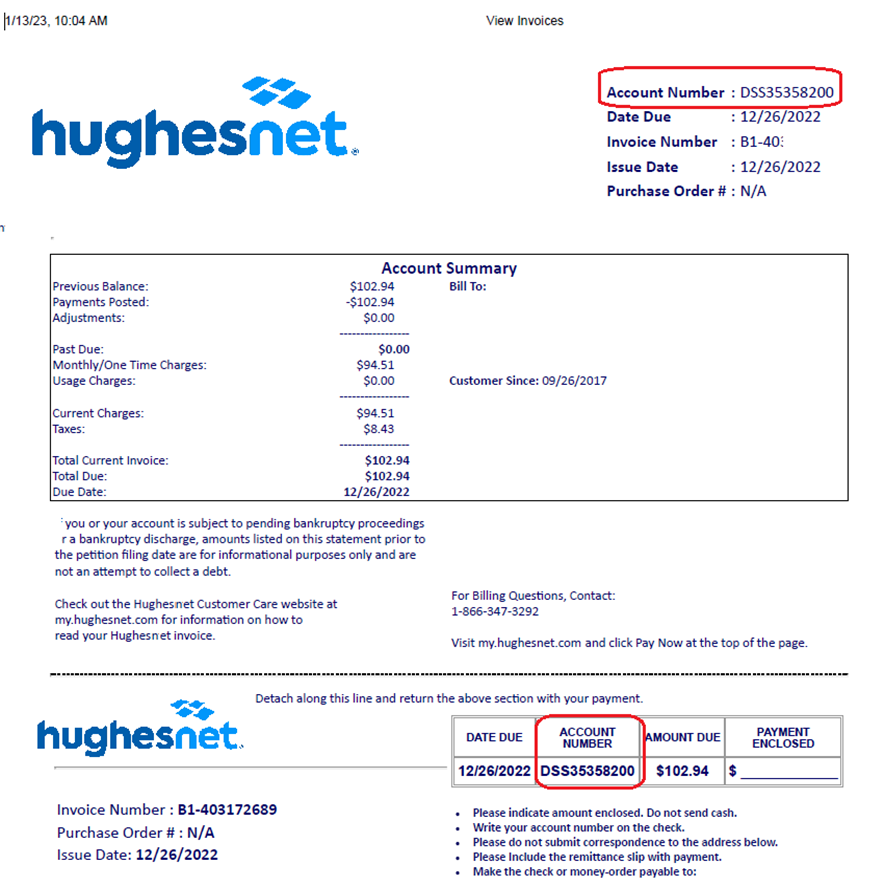
Locate your SAN from your monthly statement
Your Site Account Number (SAN) is the same as the account number found on a monthly statement, as shown below.
If you do not have a myhughesnet.com login, access to a billing statement or ability to get to System Control Center, contact Customer Care at 866-347-3292 for assistance.
For new Hughesnet® internet and Voice customers, on the day of installation your technician will arrive with the dish, the modem, and the Hughesnet Voice ATA (analog telephone adapter). The technician will install your internet service and set up and activate your Voice service. You will be required to accept the Voice Terms and Conditions prior to completing the Voice activation.
Wireless surveillance cameras should provide peace-of-mind without the worry of exceeding your monthly internet data usage. Below we provide four recommendations to maximize the benefits of your home Wi-Fi security system and service plan data.
1. Use a lower resolution
Many security cameras on the market, including Nest Cam and Netgear Arlo offer both a high-definition (HD) and standard definition (SD) view. Select the SD setting to reduce bandwidth and storage. See how to change Nest camera video quality.
2. Reduce frames per second (FPS)
A security camera only needs about 30 frames per second to capture good images. If your devices offer this setting reduce the frames per second.
3. Set record/upload intervals
Recording and uploading in real-time 24/7 will use a lot of your service plan data. Consider setting up your devices to sync at a set time once per day or use the motion/sound-based record function with a low sensitivity. Some products offer ‘mask’ areas or ‘Geofencing’ to avoid false recording motion in designated zones in order to allow for movement from pets, fans, and windows. Learn about Arlo Geofencing.
When motion is detected most systems record 30-second video clips. Shorter video recording lengths use less data, and longer video recording lengths use more data.
4. Limit number of cameras
While it’s easy to install 10 or more cameras in your home, consider that too many video streams will bog down a wireless router and degrade the performance of the security system overall and any other service or device that’s connected to the internet. Learn about Canary’s Wi-Fi requirements.
If you experience any issues with your security cameras, refer to your product manuals first.
Visit speed test to determine if your internet connection meets the requirements of your wireless security system. Sign in to check now. You must be connected to your Hughesnet® modem.
If your device is too far from the router or you have dense wall materials in your home, you may benefit from a Wi-Fi extender, like the Hughesnet Wi-Fi Booster or Mesh Wi-Fi Node, to improve your wireless signal.
If you have evaluated your internet usage and determined that a new service plan is right for you, you can easily switch your plan by logging in to your myhughesnet.com account or the Hughesnet® Mobile App.
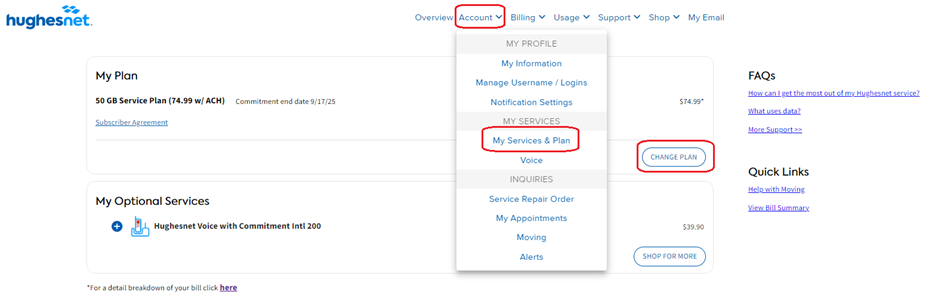
Changing your plan on myhughesnet.com Register or Sign In to myhughesnet.com and click ‘Account’ at the top of the page, then ‘My Services & Plan’ and then ‘Change Plan’.
The following page will display your current plan and the other plans available to you. Select the plan that suits you and complete the checkout. Changes will be prorated on your next invoice.
Changing your plan on Hughesnet Mobile App
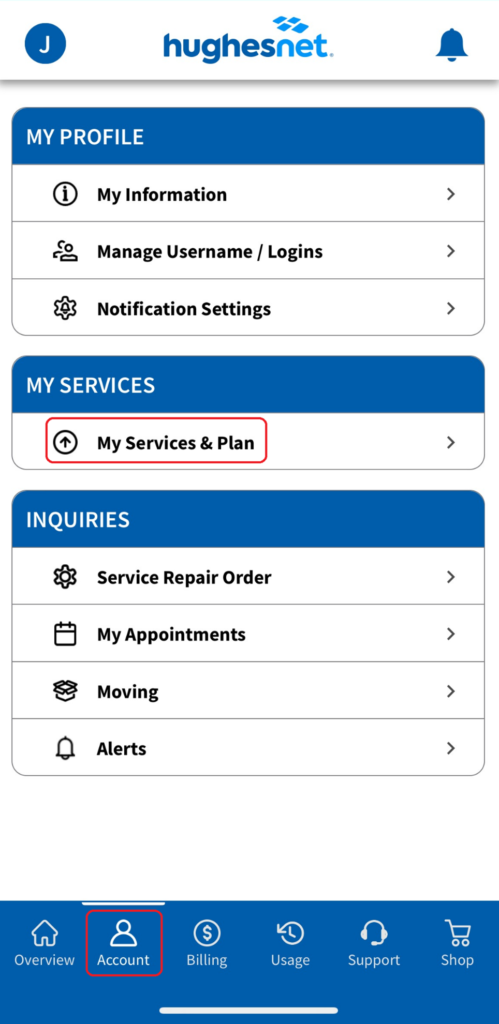
Once you are logged in to the Hughesnet Mobile App, click ‘Account’ on the bottom menu to see ‘My Services & Plan’.
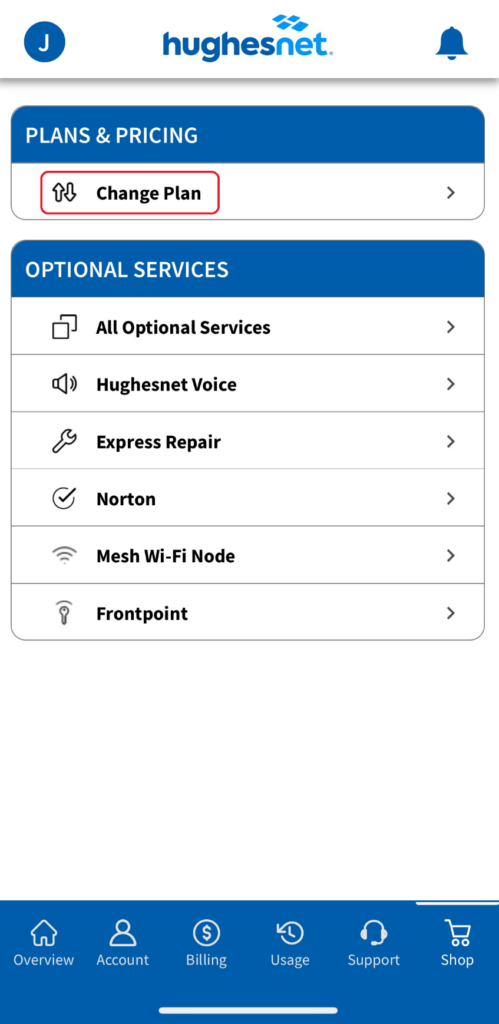
Click on ‘My Services & Plan’ > ‘Change Plan’ to see your current plan and the other service plan offerings available for you. Simply select a plan and click ‘Purchase’.
If you have questions about your service plan or changing your plan, contact Customer Care at 866-347-3292.